
Are you tired of your old word processor? Are you drowning in a sea of documents with questionable naming conventions?
If you’re searching for something that can make blogging a simpler, better-organized task, you’re at the right place. Scrivener was made for writers like you – those who don’t settle for mediocre solutions. Read on to find out how this app can help make the blogging business smoother and easier.
Why Choose Scrivener?
![]()
Scrivener makes managing long-term and large projects a breeze. It eliminates the issue of messy folders that contain thousands of files, makes research, brainstorming, and outlining easier, and helps you stay on track with your writing. Any word processor can do the job, you may contend, but not all of them can make it simpler. While Word, Google Docs, Pages, and similar apps get the job done just fine, Scrivener is a step-up in the life of any blogger.
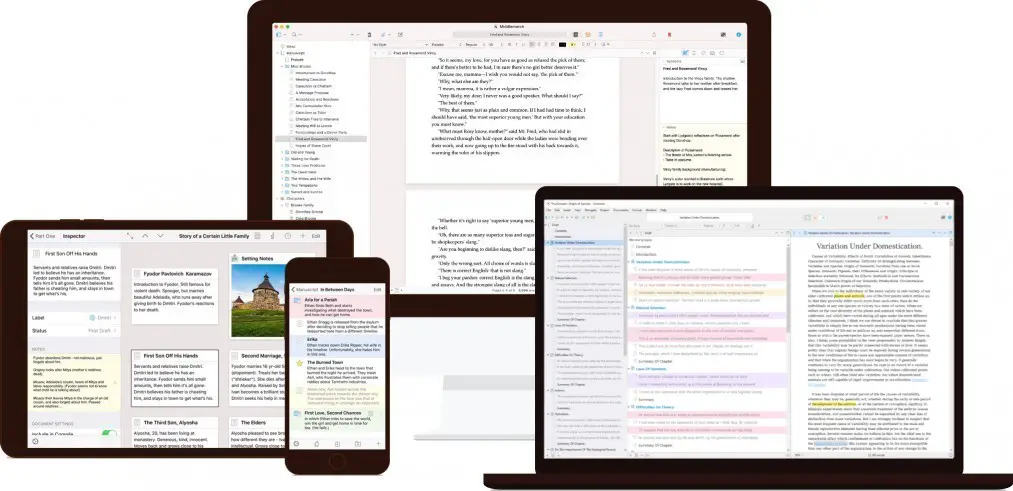
You can use Scrivener on any type of device so it’s a great choice if you like to write on the go.
Here’s how Scrivener makes the job of any blogger simpler:
- Focus on the big picture – Scrivener lets you think in terms of projects instead of separate tasks. Once you make a Scrivener project for your blog, you don’t even have to make a new file. Forget the mess of creating separate files for each blog post (and the corresponding research compilations). Month after month, you can use the same, neatly organized Scrivener project to write and get all of your blog posts publish-ready.
- Easy management – Have you decided to push the publish date for that one blog post and post another one instead? Changing the title? Want to use a piece of text in an entirely different post? No problem. Scrivener makes it easy to rearrange your work from within and without, and all you need to do is drag and drop.
- Side-by-side with all you need – Forget about the clunky Windows split-screen. Scrivener makes it easy to keep your research, ideas, references, and anything else side by side with your writing. No need to keep stuff in separate documents, folders, or screens.
- Distraction-free – It’s so, so easy to stray away from when working on a blog post. Working from home sometimes makes it hard to focus on the task at hand, and procrastination is a pit most writers fall into once in a while. Well, Scrivener won’t glue you to your keyboard, but it will surely make focusing easier with its distraction-free environment modes, keeping everything you need within the app and goal-tracking features that keep you motivated.
- Digital formats galore – Sometimes you need a . DOC, other times a publish-ready. HTML is all you want, and other times, you may want to offer a . PDF or even an.EPUB as an extra to your readers. You don’t need 4 programs to do all that – just Scrivener will do.

Scrivener from Left to Right
To be fair, Scrivener can be a bit much when you first open it. It’s chock-full with features so it can seem overwhelming at first. But once you take an hour or two to get to know the app, you’ll realize it’s not that complex after all. Here’s a brief introduction to help you out. Scrivener is essentially made up of 3 parts – the binder, the editor, and the inspector.
On the Left – The Binder
The left-hand side of Scrivener is the part that helps you stay organized – the binder. You can create as many documents for the project and write in chunks that are as tiny or as big as you like, and the binder will give you a sleek overview of everything. Over here, you get the overview of all of your text, research, ideas, and documents neatly nested in folders and sub-folders that can be expanded and collapsed. From the binder, you can access and rearrange anything you stored in your project. Even huge, long-term projects aren’t too much for the program. Visually oriented people rejoice – you can even color-code your binder and use icons for more intuitive navigation.
In the Center – The Editor
The biggest part of the screen is devoted to the editor – pretty much like any other word processor out there. This is where the magic happens. The difference is that you can open several editor panes at the same time. Whether you like to work on multiple tasks at the same time, need your research on the side, or even want to look at different parts of the same document at the same time, you can divide your workspace as you please. Of course, you get all of the features (and the bells and whistles) of other word processors too: a formatting bar, a ruler, header and footer bars with document info, and a grammar and spell checker.
On the Right – The Inspector
Need some extra info? Look to the right (or, if it’s not already open, click on the circular, blue “i” button on the top right).
The inspector gives you a lot of technical information about the currently opened document, including:
- Synopsis
- Document notes
- References
- Annotations and comments
- Labels and status
- Meta-data

Extra Scrivener Features That Bloggers Love
Outlining At a Glance
If you had been a writer in the previous century, you’d likely have to use a physical corkboard to plan and outline your writing. Then, you’d need to make changes to the index cards and your manuscript simultaneously. Scrivener’s Corkboard feature makes this ancient outlining method automatic. Whenever you want to rearrange chapters or headings, the Corkboard will give you all the information you need to keep a clear overview – not more and not less.
Set Word Count Targets and Stay on Track
Most bloggers try to keep their post lengths more or less consistent. So, say for example, that your articles need to have a minimum of 1,000 words, and a maximum of 1,500 words, with 1,300 being the sweet spot you usually try to hit. Well, keeping track of this is not always easy. Scrivener lets you set up word count targets for each document. Hit that sweet spot with easy-to-set-up word count goals with minimums and overrun allowances. If you write short-form, you can set up character count goals too!
Distraction-free Writing
So you’re done with brainstorming, planning, outlining, and researching? It’s time to get down to work. Scrivener’s full-screen composition mode won’t let other stuff distract you. It removes everything you don’t need and leaves you face-to-face with your writing. I’ve been exploring better ways to handle my day-to-day tasks, and Scrivener was a revelation that changed everything. And, honestly, with the license price set to less than $50, I believe Scrivener is an incredible solution that will ultimately save you money. Next up, you may want to explore a guide on what to do when you can’t write anymore.

Rafal Reyzer
Hey there, welcome to my blog! I'm a full-time entrepreneur building two companies, a digital marketer, and a content creator with 10+ years of experience. I started RafalReyzer.com to provide you with great tools and strategies you can use to become a proficient digital marketer and achieve freedom through online creativity. My site is a one-stop shop for digital marketers, and content enthusiasts who want to be independent, earn more money, and create beautiful things. Explore my journey here, and don't forget to get in touch if you need help with digital marketing.